How to Fix a Battery Charger That Makes a Buzzing Sound

Time:2026-10-02 Author:Henry
0%

A battery charger should usually sound almost silent. A faint hum can occur when its transformer or switching circuit operates. A sharp buzz, however, deserves attention.

Many readers ask, “Why does my battery charger make a buzzing sound?” The answer may involve loose internal components, coil vibration, capacitor stress, poor ventilation, or an incompatible battery. The sound can change when the battery begins charging, when the adapter becomes warm, or when the charger is placed on a hard table. That detail matters. It helps separate normal electrical vibration from a developing fault.

Safety data supports a cautious approach. The U.S. Consumer Product Safety Commission’s lithium-ion battery safety guidance warns users to stop using damaged, swollen, overheated, or unusually behaving batteries and chargers. NFPA’s Home Structure Fires research also identifies electrical distribution and lighting equipment as important sources of residential fire risk. These reports do not mean every buzzing charger is dangerous. They do show why small warning signs should not be ignored. Electrical Safety First similarly advises consumers to replace equipment showing buzzing, crackling, burning smells, or visible damage.

This guide explains how to inspect the plug, cable, battery contacts, ventilation, and charging environment. It also shows when testing should stop. Unplug it first. Never open a mains-powered charger casually. A reasonable mistake is assuming that a low-volume hum is always harmless; careful diagnosis requires context, not guesswork.
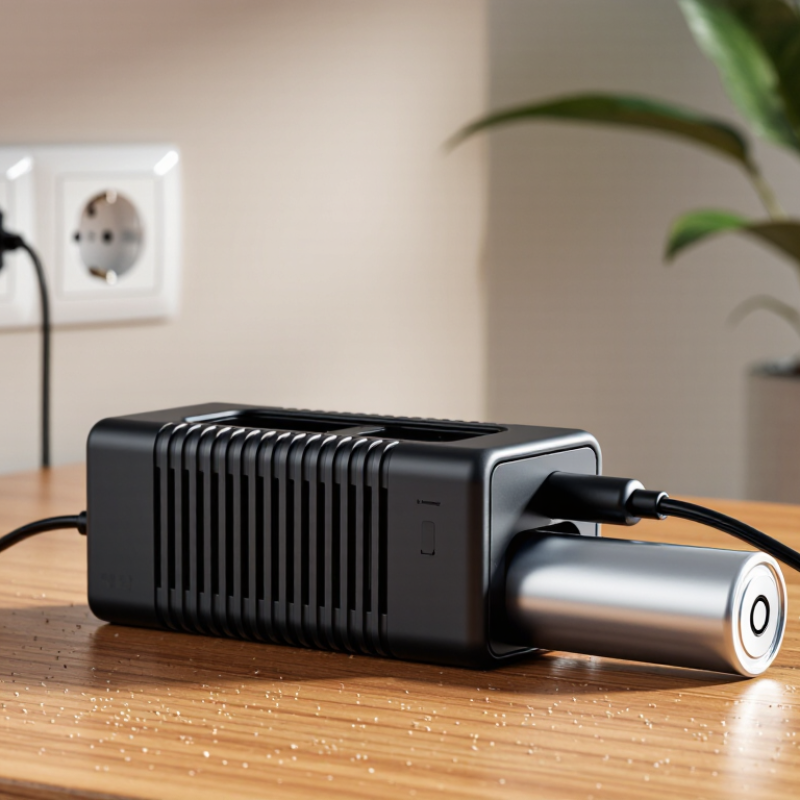
How to Fix a Battery Charger That Makes a Buzzing Sound

Identify the Source and Type of the Buzzing Sound

A battery charger can buzz for several different reasons. Identify the sound before replacing anything. A low, steady hum often comes from the internal transformer. It may become louder while charging a deeply discharged battery. This sound is usually harmless when the charger stays cool and operates normally.

A sharp clicking or pulsing buzz deserves closer attention. It can come from an electronic switching circuit repeatedly starting and stopping. Disconnect the battery, then listen again from a safe distance. If the sound stops, the battery, cable, or connection may be causing the problem. Check for loose clamps, damaged insulation, moisture, or white corrosion on the terminals. Do not touch exposed conductors. A sizzling sound, burning odor, or visible spark indicates a possible electrical fault. Unplug the charger immediately.

Fan noise has a different character. It rises and falls with temperature, while a transformer hum usually remains steady. A rattling case may point to a loose screw, cover, or cooling fan. I once assumed a charger was failing because of a loud vibration. The real cause was a poorly supported surface amplifying the sound. My diagnosis was too quick. Place the unplugged charger on a firm surface and test it again under normal conditions. Never open the housing while connected to power. If buzzing continues, the charger overheats, or the sound changes suddenly, have a qualified technician inspect it.

Check the Charger, Cable, and Power Outlet for Visible Damage

How to Fix a Battery Charger That Makes a Buzzing Sound

A buzzing charger deserves a careful inspection. Unplug it before touching the plug, cable, or casing. Look for cracks, melted plastic, dark scorch marks, exposed wires, or loose pins. Even a small split can allow heat or moisture inside. Do not open the charger. Internal parts may remain energized after disconnection.

Check the cable from end to end. Bend it gently, but never force it. Fraying near the connector is a common warning sign. Examine the power outlet too. It should hold the plug firmly, without sparking, heat, or a burnt smell. Test the outlet with another safe appliance, if available. If that appliance also behaves strangely, stop using the outlet and ask a qualified electrician to inspect it. I once assumed a faint buzz was harmless; that assumption was careless.

Tips: Place the charger on a hard, uncovered surface while testing. Keep it away from bedding, water, and direct sunlight. If the buzzing becomes louder, the charger gets hot, or the outlet shows damage, unplug it immediately. A damaged charger or cable is usually safer to replace than repair. If nothing looks wrong, the sound continues, and you cannot identify its source, have a qualified technician check it. Don't keep guessing.

Test the Charger Under Safe, Controlled Conditions

A charger that suddenly makes a buzzing sound needs a controlled test, not a quick guess. Unplug it and inspect the cable, plug, casing, and ventilation openings. Look for melted plastic, dark marks, loose parts, or a sharp electrical smell. Keep it dry. Do not open the casing, even when the charger seems powerless.

If the exterior looks intact, place the charger on a hard, nonflammable surface. Keep paper, fabric, and other heat-sensitive items away. Connect it only to the correct battery type and voltage. Stay nearby during the test. A soft, steady hum may come from internal magnetism, but a loud, uneven buzz is more concerning. Watch for heat, flickering indicators, smoke, or a smell like burning insulation. Stop immediately if any warning appears.

A voltage meter can help verify the output, but use it only if you understand the charger’s terminals and settings. Never bridge the contacts with metal tools. Compare the measured output with the value printed on the charger or its instructions. A reading that jumps sharply, stays far outside the stated range, or appears without a connected battery suggests an internal fault. I have sometimes mistaken normal vibration for failure, so sound alone is not enough evidence. Still, repeated buzzing should not be ignored. Retire the charger and ask a qualified service professional to assess it.

How to Fix a Battery Charger That Makes a Buzzing Sound

Test the Charger Under Safe, Controlled Conditions

Before investigating a buzzing sound, disconnect the charger from the battery and inspect the cable, plug, and casing for damage. If the charger is designed for lithium-ion cells, the typical full-charge voltage is approximately 4.2 V per cell: 4.2 V for one cell, 8.4 V for two cells, 12.6 V for three cells, and 16.8 V for four cells. Use a suitable meter and compare the measured output with the charger label and battery specification. Stop testing immediately if the voltage is unstable, the charger becomes unusually hot, or the buzzing increases.

Clean, Tighten, or Replace Faulty Charger Components

A buzzing charger deserves attention, not casual dismissal. Disconnect it from power before touching the case, terminals, or cables. Let it cool completely. A faint hum can come from normal electrical vibration, but a harsh or changing buzz may signal a loose part or failing component. I once ignored a charger that buzzed only after warming up. That delay made the fault easier to overlook, not safer. Stop using it if you smell burning, see damage, or notice excessive heat.

Start with cleaning. Use a dry cloth or soft brush to remove dust from vents, plugs, and charging contacts. Never pour cleaner into the charger. Check the cable for cuts, crushed sections, or exposed wires. Inspect the terminals for corrosion. If accessible, tighten loose external screws and connectors carefully. Do not open a sealed charger unless you are trained to work safely with electrical components. My first inspection was too quick; bright lighting revealed a loose connection near the plug.

If the buzz continues, replace the damaged cable or the complete charger. Choose a unit with matching voltage, current, polarity, and connector size. A higher current rating is not automatically safer. Follow the device manual and local electrical guidance. Internal capacitors can retain dangerous energy after unplugging. A qualified technician should handle internal repairs, especially when the buzzing comes from the transformer area. Keep testing brief and supervised.

How to Fix a Battery Charger That Makes a Buzzing Sound - Clean, Tighten, or Replace Faulty Charger Components

Observed Buzzing Pattern Likely Cause Safe Checks Recommended Action Priority
Low hum that is steady while charging Normal vibration from the charger's transformer or switching components Place the charger on a solid surface and confirm that the sound is quiet, stable, and not accompanied by heat or odor. Monitor the charger. Keep ventilation openings clear and avoid placing it on soft fabric. Low
Buzzing becomes louder when the battery is nearly full Normal change in charging load or a vibrating internal component Check whether the sound stops after the charging cycle ends and whether the charger remains only mildly warm. If performance is normal, continue observing. Replace the charger if the noise progressively increases. Medium
Buzzing with intermittent charging Loose plug, damaged cable, contaminated connector, or failing solder joint Unplug the charger. Inspect the cable, plug, connector, and charging socket for looseness, dirt, bent contacts, or damaged insulation. Clean accessible contacts with approved electrical-contact cleaner and tighten external connections. Replace damaged cables or the charger. High
Buzzing only when the plug or cable is moved Strained cable, broken conductor, loose strain relief, or worn connector With power disconnected, gently examine the cable near both ends. Do not bend it repeatedly or test a visibly damaged cable while energized. Replace the cable if detachable. Replace the complete charger if the cable is permanently attached. High
Sharp buzz, crackle, or popping sound Electrical arcing, damaged insulation, loose internal connection, or component failure Disconnect power immediately. Check for scorch marks, melted plastic, smoke, or a burning smell without opening the enclosure. Stop using the charger and replace it. Do not operate it until repaired by a qualified technician. Critical
Buzzing accompanied by excessive heat Overloaded charger, blocked ventilation, shorted component, or internal failure Unplug the charger and allow it to cool. Confirm that the output rating matches the battery requirements and that vents are unobstructed. Do not continue charging. Replace the charger if overheating returns or if the casing is warped or discolored. Critical
Buzzing starts after a spill, dust buildup, or long storage Moisture, dirt, corrosion, or debris affecting airflow and electrical contacts Disconnect the charger and inspect it only after it is completely dry. Look for corrosion or residue around external connectors. Clean the exterior and accessible contacts. Do not energize a wet charger; replace it if liquid entered the enclosure. High
Buzzing occurs with a particular battery only Battery fault, incompatible charging profile, high internal resistance, or damaged battery contacts Stop using that battery and compare the charger with a compatible battery of the same type and voltage. Follow the battery manufacturer's service instructions. Replace the battery if it is swollen, leaking, unusually hot, or damaged. Critical
Buzzing from the wall outlet or power strip Loose outlet contact, overloaded power strip, or wiring fault Disconnect the charger and check for warmth, discoloration, looseness, or a burning odor around the outlet. Stop using the outlet and have it inspected by a qualified electrician. Avoid overloaded extension leads. Critical
Buzzing continues after cleaning and tightening external connections Worn fan, transformer vibration, capacitor failure, or another internal defect Confirm that the noise remains with a correct battery, clean connections, and a known-good outlet. Replace the charger unless internal servicing is performed by a qualified technician. Do not open sealed chargers. High
Safety note: Always disconnect the charger before cleaning or inspecting it. Stop using the charger immediately if you notice smoke, sparks, a burning odor, liquid entry, damaged insulation, excessive heat, or a swollen battery.

Know When to Stop Troubleshooting and Seek Professional Repair

How to Fix a Battery Charger That Makes a Buzzing Sound

A faint hum can come from normal transformer vibration. A sharp, growing buzz deserves caution. Unplug the charger immediately if it becomes hot, smells burnt, sparks, or shows melted plastic. Stop troubleshooting then. Do not open the casing or touch exposed wires. Inspect the cable, plug, and socket only after disconnecting power. A loose connection may create heat inside the charger, even when the outside looks normal.

The Electrical Safety Foundation International estimates that electrical problems cause about 51,000 home fires annually in the United States. These fires result in nearly 500 deaths, 1,400 injuries, and $1.3 billion in property damage. Those figures are not charger-specific, but they show why unusual electrical sounds should not be ignored. A qualified technician can test insulation, output voltage, and internal components safely. If the buzzing continues with different outlets, replacement may be safer than repair. I would not assume a new-looking charger is reliable.

Tips: Stop using the charger when buzzing changes pitch, increases, or appears with heat. Keep it on a hard, dry surface. Never cover it with clothing or bedding. If smoke appears, leave the area and contact emergency services. Do not keep testing it “one more time.” That small decision can be the risky one.

FAQS

Is a faint buzzing sound from a charger always dangerous?

Not always. A soft, steady hum may come from normal electrical vibration. A sharp or changing buzz needs caution.

When should I stop using a buzzing charger immediately?

Stop when it becomes hot, smells burnt, sparks, or shows melted plastic. Disconnect it from power. Do not test it again.

What should I inspect after unplugging the charger?

Let it cool completely first. Check the cable, plug, socket, vents, and charging contacts for damage, dust, or corrosion.

How can I clean a charger safely?

Use a dry cloth or soft brush. Remove dust from vents and contacts. Never pour cleaner into the charger.

Can I tighten a loose charger connection myself?

Tighten accessible external screws carefully, if the charger is fully disconnected. Do not open a sealed case without proper training.

What does a changing buzzing sound suggest?

It may indicate a loose part or failing component. Buzzing that increases after warming deserves extra caution.

When should I replace the cable or complete charger?

Replace damaged cables or chargers showing persistent buzzing. Match voltage, current, polarity, and connector size exactly.

Why should internal charger repairs involve a qualified technician?

Internal capacitors can retain dangerous energy after unplugging. A technician can test insulation, output voltage, and internal parts safely.

Where should I place a charger during use?

Keep it on a hard, dry surface with open ventilation. Never cover it with clothing or bedding.

What mistake can make charger troubleshooting riskier?

Repeating a quick test can create false confidence. I once inspected a charger too quickly; bright light revealed a loose connection.

Conclusion

A buzzing battery charger can be caused by normal electrical vibration, a loose internal component, a damaged cable, or a problem with the power outlet. If you are asking, “Why does my battery charger make a buzzing sound,” first identify whether the noise is faint and steady or loud, irregular, and accompanied by heat, sparks, smoke, or a burning smell. Inspect the charger, cable, plug, and outlet for cracks, exposed wires, discoloration, or looseness before continuing.

Test the charger only under safe, controlled conditions by disconnecting it from the battery, trying a suitable outlet, and checking whether the sound changes. Never open a powered charger. If the issue appears minor and the unit is unplugged, gently clean dust from the exterior and ensure connections are secure. Replace damaged cables or faulty components rather than attempting unsafe repairs. Stop troubleshooting immediately if the charger overheats, sparks, smells burned, or makes a harsh buzzing noise, and seek professional repair or replace the unit.

Henry

Henry

Henry is a dedicated marketing professional with a profound expertise in the company's offerings. With years of experience in the industry, he possesses an impressive understanding of the market dynamics and consumer behaviors that drive success. Henry is committed to sharing his insights through......